Most leaking pipes are found the same way: a damp cupboard floor under the sink, a drip landing on the boiler, a brown ring spreading on the ceiling, or a hiss from somewhere behind the bath panel. Your first thought is how to make it stop, and your second is whether you need somebody out tonight or whether it can wait until the morning.
I have been fixing leaks around Ipswich for more than forty years, and the advice online usually goes wrong in one of two ways. Either it tells you to wrap some tape round it, without saying which tape, on which pipe, or how long it will last. Or it skips the part that catches most people out: turning off the stopcock does not stop every leak. This guide covers both. It walks you through shutting off the right water, finding exactly where the leak is, choosing the temporary fix that suits that kind of leak, and knowing when to stop and call.
Stop the Water First: 5 Steps
Before you reach for any tape or putty, take the pressure off. Nothing seals well against water that is still coming out, and every minute of running water is more damage to clean up.
Look for an isolating valve on that pipe
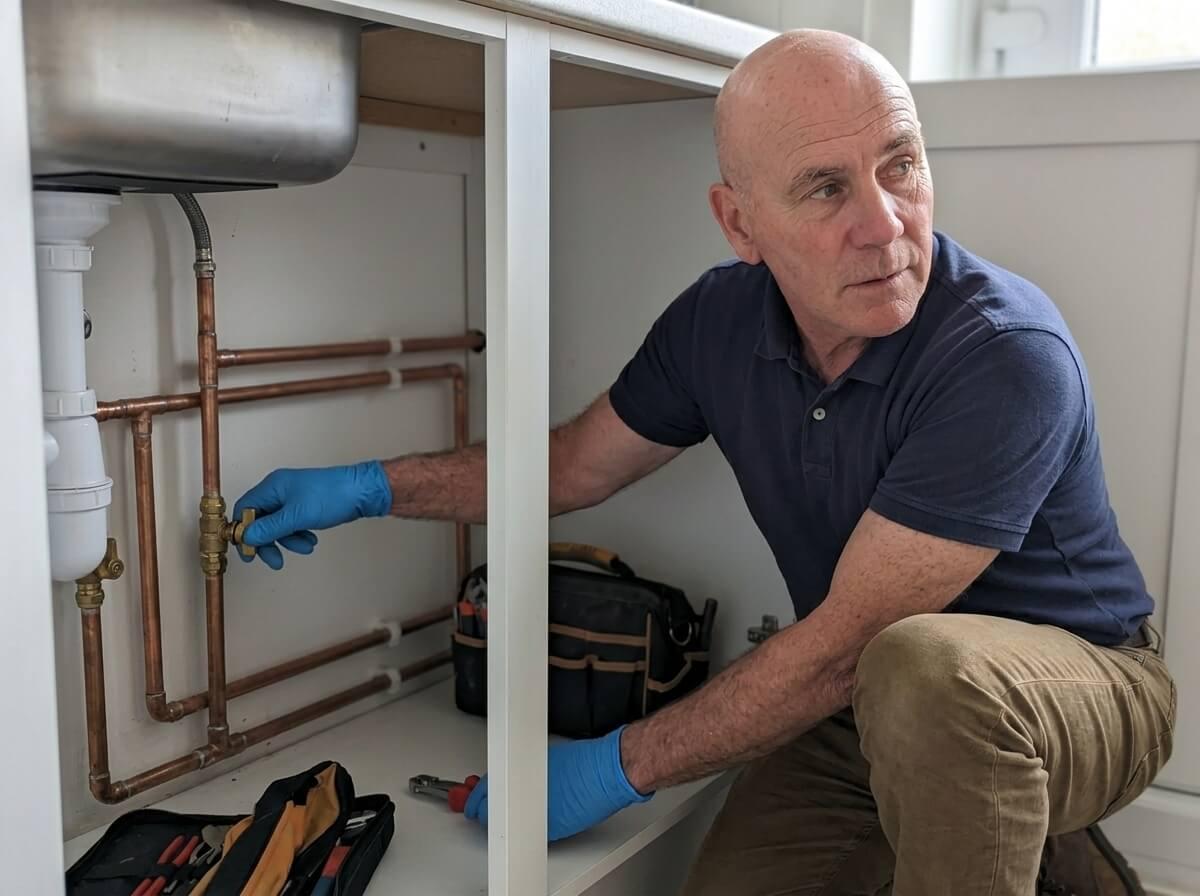
Most modern homes have small isolating valves on the pipes to each tap, toilet and appliance. They look like a short brass or chrome barrel with a slot for a flat screwdriver, or a little blue or red lever. Turn it a quarter turn so the slot or lever sits across the pipe, not along it, and that one pipe is off while the rest of the house still has water. If the leak is downstream of a valve like this, it is the quickest fix of all.
Turn off the stopcock
If there is no isolating valve, or the leak is on the main pipework, turn the stopcock clockwise until it stops. It is usually under the kitchen sink, but in Ipswich homes I also find them in downstairs toilets, under the stairs, in garages and behind kick boards. My guide on how to locate your stopcock shows every place to look. If it will not turn, do not force it with a long bar: see what to do if your stopcock is stuck or seized.
Drain the pipe
Open the kitchen cold tap and flush the toilets. This empties the water still sitting in the pipes and takes the pressure off the leak, which will slow to a dribble and then stop. If the leak is on a hot pipe or in the bathroom of an older house with a loft tank, the stopcock alone may not do it: check the table in the next section.
Make the electrics safe
If water is near sockets, a fuse box, an extension lead or a light fitting, switch off that circuit at the consumer unit. If you cannot reach the consumer unit without standing in water, do not try: leave it and call. Never touch a light switch on a ceiling that is dripping.
Catch the water and protect what you can
Put a bowl or bucket under the drip, lay towels down, and move anything electrical, valuable or soft away from it. If the water is collecting in a bulge on the ceiling, my guide to water leaking through the ceiling explains how to deal with it safely.
Will Turning Off the Stopcock Stop the Leak?
This is the question that catches most people out. The stopcock only controls water coming in from the mains. Plenty of the pipes in a house are fed from somewhere else, and they keep leaking after the stopcock is off. Here is how to shut off each kind.
| WHERE THE LEAK IS | DOES THE STOPCOCK STOP IT? | WHAT TO DO |
|---|---|---|
| Kitchen cold tap pipe, or any pipe in a home with a combi boiler | Yes. These are fed straight from the mains. | Close the isolating valve or stopcock, then open the kitchen cold tap to drain the pipe. |
| Hot pipes, bathroom cold taps or toilets in an older home with a cold water tank in the loft | Not straight away. The tank keeps feeding them until it empties. | Close the gate valve on the pipe leaving the tank (loft or airing cupboard) and run the bath taps to drain it. No valve? Tie the float arm up and run the taps. |
| Hot pipes from an unvented (pressurised) cylinder | Usually. The cylinder is fed by the mains, but it holds a lot of water. | Close the stopcock and the cold inlet valve by the cylinder, switch off the boiler and immersion, then open a hot tap. |
| Radiator, radiator valve or central heating pipe | No. Heating is a separate closed loop. | Switch the boiler off, close both valves on that radiator, and catch the drips. A combi will lose pressure and lock out, which is normal. |
| Toilet, washing machine, dishwasher or single tap | Yes, but you rarely need to. | Use the isolating valve on the pipe to that appliance: a quarter turn of a flat screwdriver or the little handle, so the slot sits across the pipe. |
| Sink, bath, shower or washing machine waste pipe | No, and it does not need it. Waste pipes carry no pressure. | Stop using that sink or appliance. The leak only runs when water is going down it. |
How Urgent Is a Leaking Pipe?
Not every leak needs a plumber out at midnight. What matters is how fast the water is coming out, whether you can stop it, and where it is going. Use this to judge yours.
| WHAT YOU SEE | HOW URGENT | WHAT TO DO |
|---|---|---|
| Water spraying, gushing or pouring from a pipe | Emergency | Stop the water now, switch off electrics near it, and call a plumber straight away. |
| Water coming through a ceiling, a light fitting or down a wall | Emergency | Turn off the water and the lighting circuit at the fuse box. Do not touch the switch on a wet light. |
| A leak you cannot stop because the stopcock is stuck, broken or missing | Emergency | Wrap a towel round it, catch the water, and call. A plumber can freeze the pipe or fit a new stopcock. |
| A steady drip from a joint or valve, caught in a bowl, water now off | Same day or next day | Try the safe temporary fixes below and book a repair. Keep the water off when you are not using it. |
| A drip under the sink only when the tap is running or the sink is draining | Within a few days | Usually a waste fitting, not a supply pipe. Hand-tighten the plastic nuts and check the washers. |
| A slow weep, green or white crust on a fitting, or a damp stain under a pipe | Book within a week or two | Not urgent, but it will get worse and it rots boards slowly. Put a tissue under it to see how fast it is. |
| Damp patch, mould or a rising water bill, but no pipe you can see | Book a leak check | Do the water meter test below. A hidden leak needs finding before anyone starts opening walls. |
One more thing makes any leak more urgent: who is in the house. If someone is elderly, unwell, or there is a young baby and you have had to turn off all the water, that is reason enough to call tonight rather than tomorrow.
Find Exactly Where the Pipe Is Leaking
Water runs along a pipe and drips from the lowest point, so the drip you can see is often a long way from the leak. Before you fix anything, find the real source. With the water briefly back on, or before you turned it off:
- ●Dry everything first. Wipe the pipe and fittings completely dry with kitchen roll, then watch where the first bead of water appears.
- ●Run a dry tissue along the underside. Start at the drip and work back along the pipe. The tissue goes wet at the leak.
- ●Check every fitting on the way. Joints, valves, tap connectors and the flexible hoses under sinks are far more likely to leak than the pipe itself.
- ●Look for crust. A green crust on copper or a white chalky crust on a fitting means a slow weep that has been going on for weeks. Ipswich has very hard water, so the white scale shows up quickly.
- ●Run one thing at a time. If the drip only appears when a tap is running or a sink is draining, it is on the waste side, not the supply. If it appears when the heating is on, it is a heating pipe.
Once you know whether it is the pipe itself, a joint, or a waste fitting, you know which fix to use. If you cannot find it at all, because it is under a floor or inside a wall, skip to the section on hidden leaks below.
Temporary Fixes for a Leaking Pipe, Compared
There is no single product that fixes every leak. Each of these suits a different job, and using the wrong one is how a quick fix ends up letting go at three in the morning. Every one of them works best on a pipe that is turned off and dry.
| FIX | BEST FOR | HOW LONG IT HOLDS | DO NOT USE ON |
|---|---|---|---|
| Quarter turn on a compression nut | A weep or drip from a brass compression joint or valve | Can be permanent if the olive was just loose | Push-fit or soldered joints, or a nut you have already tightened |
| Pipe repair clamp | A pinhole or short split on a straight run of 15mm or 22mm pipe | Days to weeks. The most dependable stopgap | Bends, joints, or a pipe that is badly corroded |
| Self-amalgamating repair tape | Pinholes and small splits on straight pipe, and waste pipes | Hours to days on mains pressure, longer on waste pipes | Wet pipes, big splits, or hot heating pipes unless the tape says it is rated |
| Two-part epoxy putty | A pinhole, or a weep on a soldered joint, on a pipe you can dry fully | Days to weeks once fully cured | Anything still wet or dripping. It will not bond |
| Rubber patch and jubilee clips | An improvised clamp when you have nothing else | Hours | Joints or bends |
| Towel wrapped tightly round the pipe | Steering water into a bucket while you turn the water off | Minutes. It only redirects water | Anything other than buying time |
Pipe repair clamp
A repair clamp is a hinged metal or plastic shell with a rubber lining that bolts round the pipe. It is the most reliable stopgap for a pinhole or short split on a straight length of pipe, and the one I would keep in a drawer. Buy the size that matches your pipe: most pipes to taps and toilets in UK homes are 15mm, and the main runs and heating flow pipes are often 22mm. Centre the rubber over the leak, close the clamp and tighten the screws evenly, a little at a time on each side, so it pulls down square. Turn the water on slowly and watch it for a few minutes. Clamps will not seal over a joint, a bend or a valve, because the rubber cannot sit flat.
Self-amalgamating repair tape
This is not ordinary tape. Self-amalgamating silicone tape, sold as pipe repair or rescue tape, has no glue: when you stretch it, it fuses to itself into a solid rubber sleeve. With the pipe off and dry, start a few centimetres to one side of the leak, stretch the tape to two or three times its length, and wrap it tightly with each turn overlapping the one before by half. Carry on a few centimetres past the leak and back again, then press the end down firmly. It handles small pinholes well and is excellent on plastic waste pipes, but on mains pressure treat it as a fix for hours or days, not weeks.
Epoxy putty
Two-part epoxy putty comes as a stick: you cut off a piece and knead it until it is one even colour, then press it firmly over and around the leak. It is useful on a pinhole, or on a soldered joint that is weeping, where a clamp will not fit. The catch is that it will not bond to a wet pipe, so it only works once the pipe is fully drained and dried, and it needs to cure for the time on the packet before the water goes back on. Rub the pipe with sandpaper or wire wool first so it has something to grip.
Rubber and jubilee clips, or a towel
If you have no repair kit, a piece of rubber cut from an old inner tube or a washing-up glove, wrapped over the leak and held with two or three hose clips (jubilee clips), makes a rough clamp that will hold for a few hours. Failing that, wrap a towel tightly round the pipe so the water runs down it into a bucket. That will not stop the leak, but it stops it spraying, and it buys you time to turn the water off.
Leaking Pipe Joints: Compression, Push-Fit and Soldered
Most leaks I am called to are at a joint, not in the middle of a pipe. How you deal with one depends entirely on what kind of joint it is, and the wrong approach can turn a drip into a spray.
Compression joints
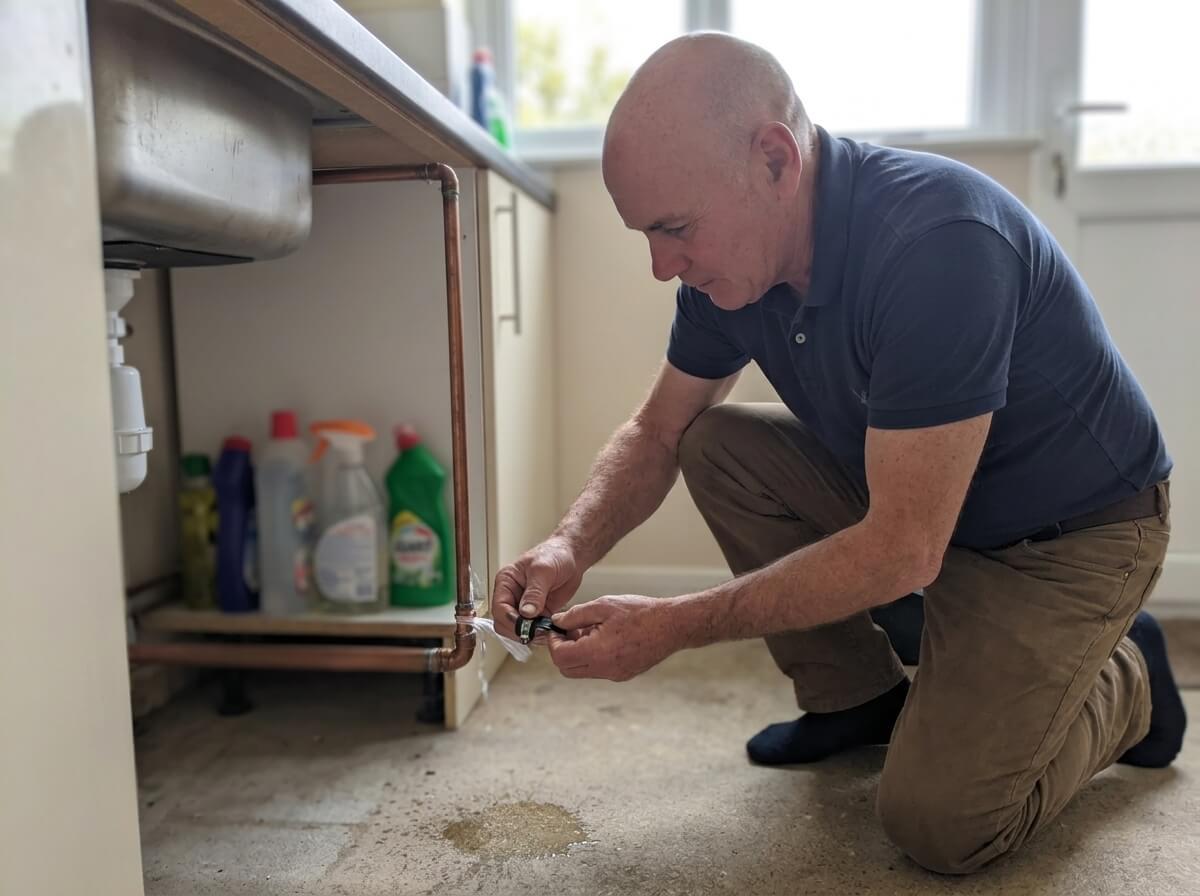
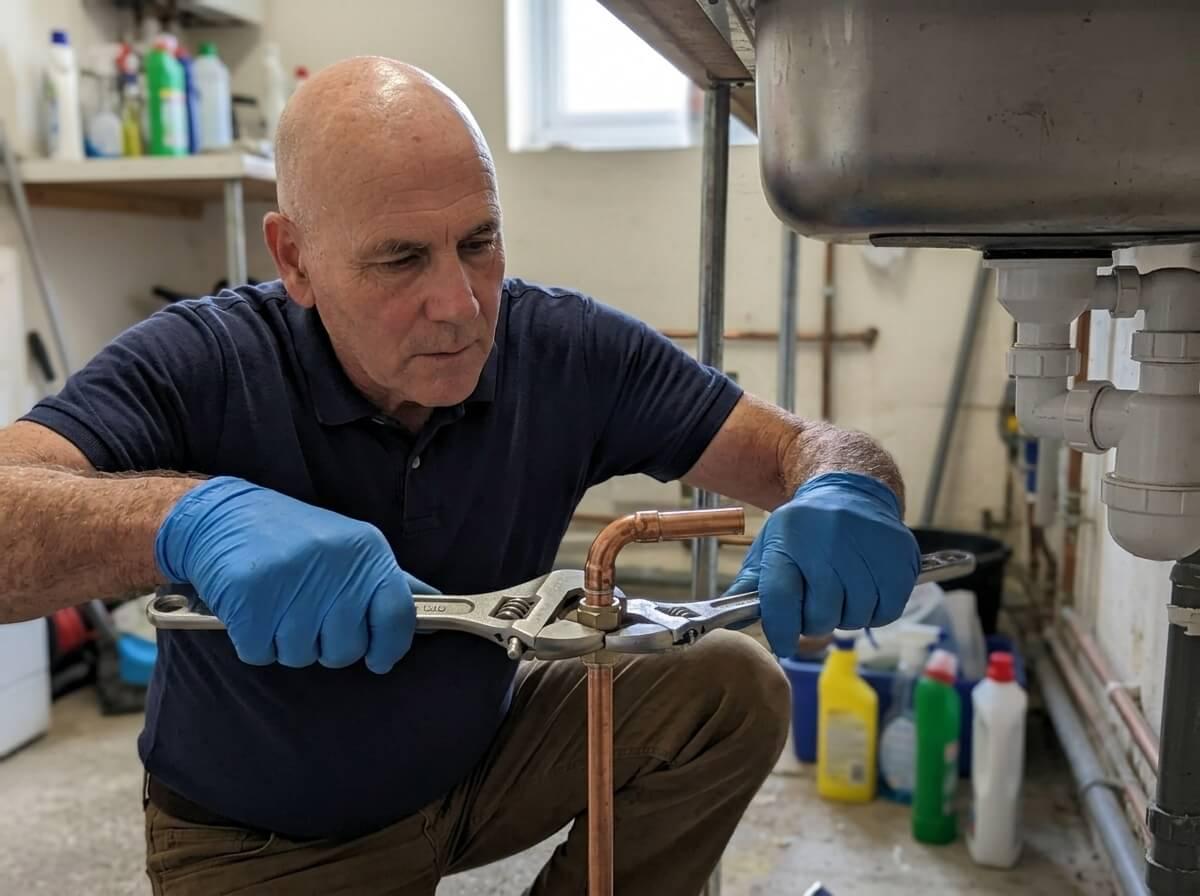
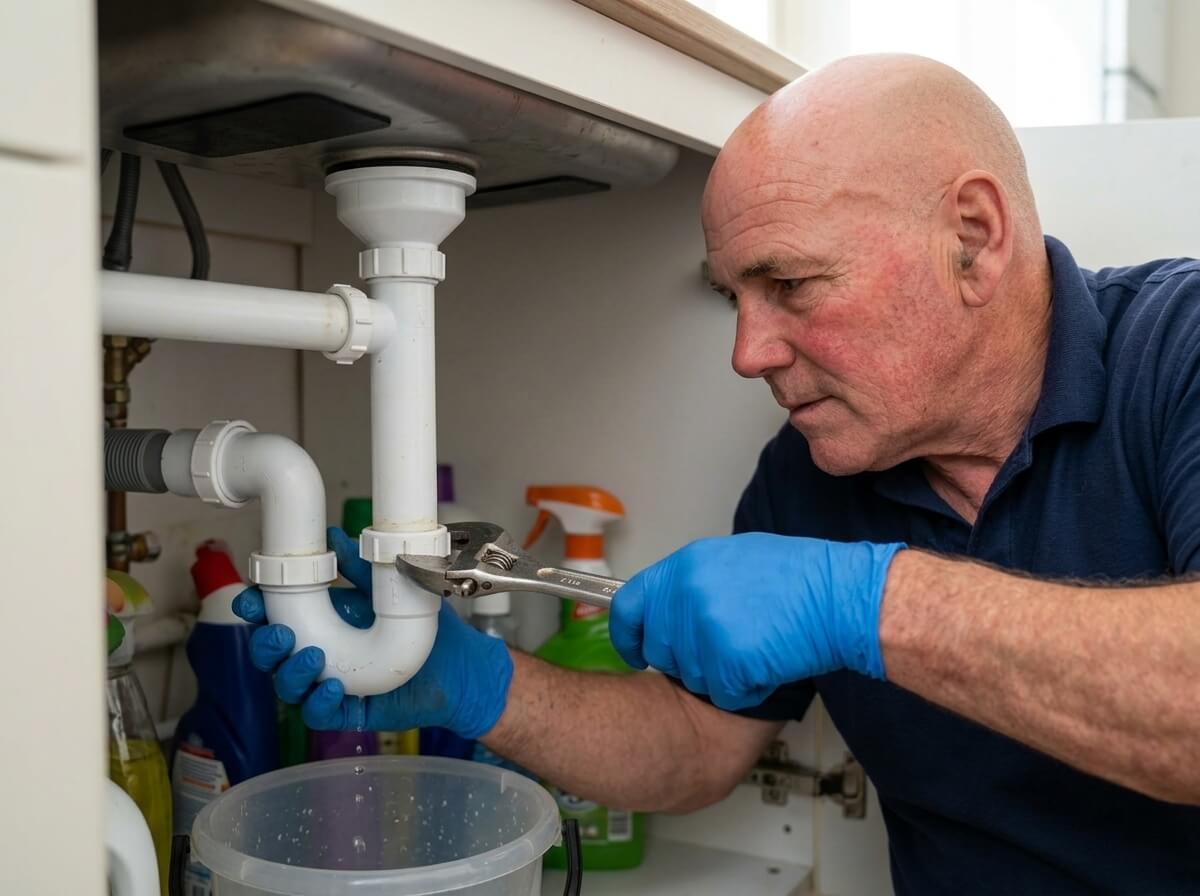
A compression joint has a brass nut on each side of the fitting. Inside, a brass ring called an olive is squeezed onto the pipe as you tighten the nut. These often weep after a pipe has been knocked, or after years of the heating warming and cooling. Hold the body of the fitting still with one spanner, so you do not twist the pipe, and turn the leaking nut a quarter turn clockwise with a second spanner. That is the photo at the top of this page. Dry it and check. If a quarter turn has not stopped it, do not keep going: another turn rarely helps, and overtightening crushes the olive so it will never seal. At that point the olive needs replacing, which means draining the pipe and remaking the joint.
Push-fit joints
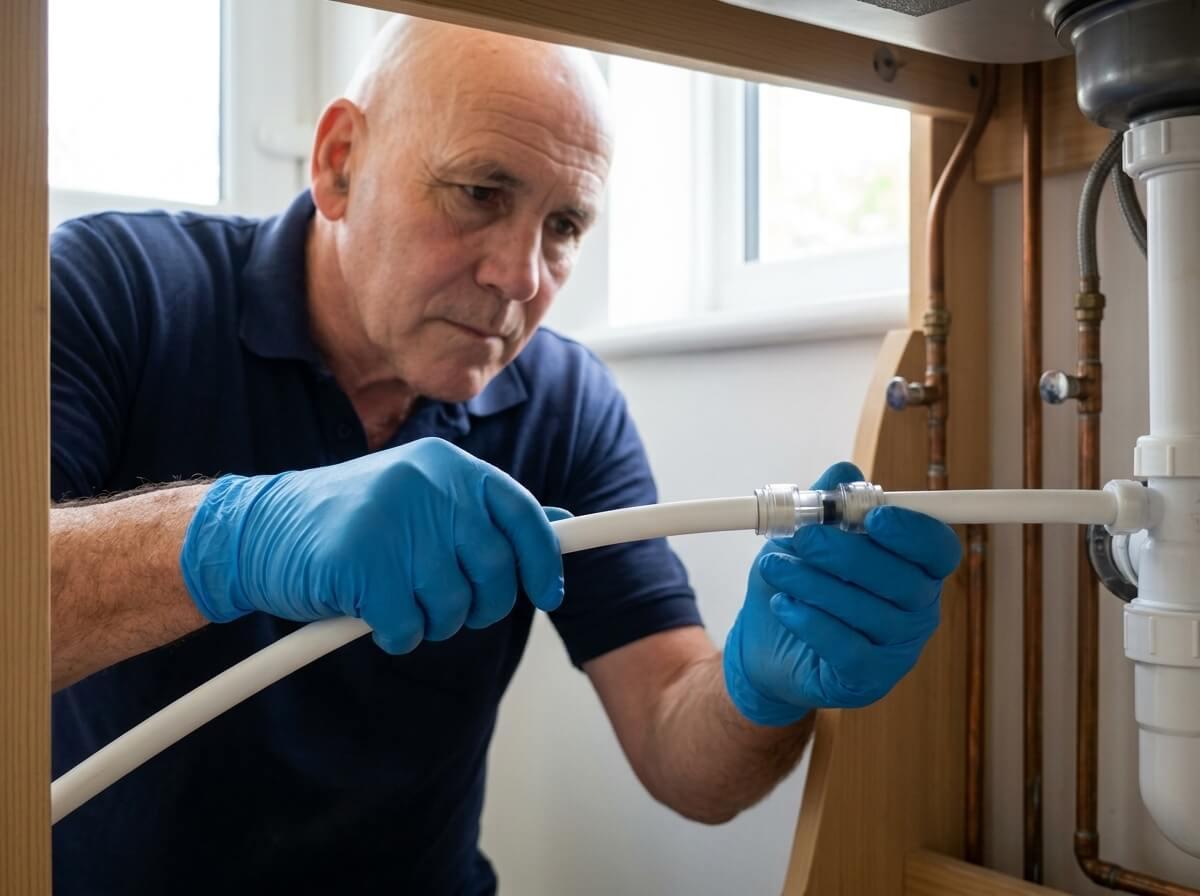
Push-fit fittings, usually white or grey plastic, grip the pipe with a ring of teeth and seal with a rubber O-ring. There is nothing to tighten, and twisting the collar can make it worse. When they leak, it is almost always because the pipe was not pushed all the way in, was cut at an angle or has a burr, has a scratch where the O-ring sits, or is plastic pipe that was fitted without its internal support sleeve. The fix is to drain the pipe, release the fitting, cut the pipe square, deburr it, fit an insert if it is plastic, and push it fully home to the depth mark. If you are not confident doing that, wrap it with repair tape as a stopgap and call.
Soldered joints
A soldered joint is a smooth copper fitting with no nuts, joined with a ring of solder. When one weeps, there is no way to tighten it. It has to be drained completely, heated, and either re-soldered or cut out and replaced. Do not try this with a blowtorch yourself unless you are used to it: there is a real fire risk to joists, insulation and anything behind the pipe. A smear of epoxy putty over the joint, on a dry pipe, is the safest stopgap until it can be repaired.
A Leaking Waste Pipe Under the Sink
If the cupboard under the sink only gets wet when you use the sink, the dishwasher or the washing machine, it is almost certainly the waste pipe, not the water supply, and that is good news. Waste pipes carry no pressure, so you do not need to turn the water off: just stop using that sink until it is sorted.
- ●Hand-tighten the plastic nuts on the trap and waste pipe. They only need to be firm by hand. A spanner can crack them.
- ●Check the washers. If a nut is tight and still drips, undo it over a bucket and check the flat or cone-shaped washer inside is there, sitting straight and not split.
- ●Look at the sink waste itself. Water that runs down the outside of the pipe from directly under the plughole usually means the seal between the waste and the sink has failed.
- ●Check for a blockage. A partly blocked trap or pipe makes water back up and seep out of joints that are otherwise fine. My guide on why a sink keeps blocking covers the usual culprits.
Repair tape works better on waste pipes than anywhere else, because there is no pressure behind the water. For anything more than a quick tweak, my blocked sink and waste pipe service covers replacing traps, wastes and pipework.
Leaking Hot Water and Central Heating Pipes
Hot pipes need more care. The water can be hot enough to scald, and most tapes and putties are not rated for the temperature of a central heating flow pipe. Switch the boiler off first, and the immersion heater if you have one, and let the pipe cool before you touch it.
- ●Radiator valve leaking? Very often it is the small gland nut just under the valve head. Hold the valve body with one spanner and nip that nut up an eighth to a quarter of a turn. If it is the joint between the valve and the radiator, close both valves on that radiator to isolate it.
- ●Combi or system boiler? The heating is sealed and pressurised. A leak will make the pressure gauge drop and the boiler lock out, which stops it overheating. Do not keep topping the pressure up while it is still leaking.
- ●Older system with a small tank in the loft? That tank tops the heating up as it leaks, so the leak can go on for a long time. Tie up its float arm the same way as the big tank, and turn the boiler off.
- ●Leak on or inside the boiler? Turn it off at the spur switch and call a qualified heating engineer. Never open the boiler casing yourself.
A Pipe Leaking Behind a Wall, Under the Floor or Through the Ceiling
When you can see the water but not the pipe, resist the urge to start pulling up floorboards or cutting into plasterboard. Water travels a long way along joists and down the inside of walls, and the damp patch is often nowhere near the leak. First, confirm there really is a leak on the supply with the meter test: turn off every tap and appliance, note the reading on your water meter, wait an hour without using any water, and check it again. If it has moved, water is escaping somewhere.
My guide to the signs of a hidden water leak covers the clues to look for, and my leak detection service finds and fixes it in the same visit wherever possible, opening up only the spot that needs it. If the pipe has split rather than dripped, follow my guide on what to do when a pipe bursts.
What Not to Do With a Leaking Pipe
- ✕Do not rely on duct tape, insulating tape or PTFE tape on a pressurised pipe. None of them will hold back mains water.
- ✕Do not use bathroom silicone, superglue or filler. They will not bond to a wet pipe, and they make a proper repair harder later.
- ✕Do not keep tightening a compression nut. One quarter turn. After that you are crushing the olive.
- ✕Do not twist or tighten push-fit collars. They are not designed to be tightened.
- ✕Do not use a blowtorch or heat gun near a leak unless you are trained, especially under floors or in lofts.
- ✕Do not leave a temporary fix under pressure while you are out, asleep or on holiday. Turn the stopcock off.
- ✕Do not ignore a slow weep because it is small. Slow leaks rot floors, feed mould, and are usually not covered by insurance.
How Long Will a Temporary Fix Last?
Honestly, nobody can promise. A clamp on a clean, straight pipe can hold for weeks, and a compression nut that was just a little loose may never leak again. Tape and putty on mains pressure tend to fail without warning, often overnight when the mains pressure rises, or on a heating pipe as it heats and cools. Treat any of them as a way to get the water back on until a plumber can make the permanent repair, ideally within a day or two. Leave a bowl or tray under the repair, check it every few hours, and turn the water off at the stopcock if you go out or go to bed.
Leaking Pipes and Home Insurance
Most UK home insurance covers sudden escape of water: the damage a leak does to ceilings, floors and belongings. Many policies also include trace and access cover, which pays for finding a hidden leak and making good afterwards. What they usually do not pay for is repairing the pipe itself, or damage from a leak that has been weeping for months, which insurers treat as wear and tear. To protect a claim:
- ●Stop the water as quickly as you can. Insurers expect you to limit the damage, and a temporary fix counts as doing that.
- ●Take photos and video of the leak, the damage and the pipe before you clean up or anything is repaired.
- ●Keep receipts for everything you spend: repair kits, towels, drying equipment and the plumber.
- ●Ask your plumber for a written note of what failed and why. I am always happy to write one for your insurer.
- ●Renting? Your landlord is normally responsible for repairing the pipes. Turn off the water, then report it to them or the letting agent straight away, in writing, with photos.
- ●In a flat? Knock on the door below. Water usually reaches the neighbour’s ceiling before you can see it on your own floor.
How I Repair a Leaking Pipe Properly
A permanent repair is usually one of the quicker jobs I do. I isolate and drain the pipe, find the actual cause, and then either remake the leaking joint with a new olive or fitting, or cut out the damaged section back to sound pipe and fit a new length with compression, push-fit or soldered joints to match what you already have. If the stopcock was stiff or failed when you needed it, I can replace it with a quarter-turn valve at the same visit, and fit isolating valves where they are missing. Then I refill the system, pressure check the repair and leave it dry.
You get a fair price agreed before any work starts, with no surprises. You can read more on my burst pipe and leak repair page, and my guide to how much an emergency plumber costs explains what affects the price of an out-of-hours visit.
How to Stop Pipes Leaking in the Future
- ●Know where your stopcock is, and turn it off and on once or twice a year so it does not seize. Make sure everyone in the house can find it.
- ●Fit isolating valves on the pipes to every toilet, tap and appliance, so one leak never means turning off the whole house.
- ●Check the flexible tap connectors under sinks and behind appliances. If the braiding is rusty, frayed or bulging, replace it before it bursts.
- ●Clip loose pipes. Pipes that move every time a tap is turned off slowly work their joints loose. A few extra clips stop it.
- ●Lag pipes in lofts, garages and outside walls. Frozen pipes split, and the leak appears when they thaw. See my guide to frozen pipes.
- ●Take a meter reading now and then. It is the cheapest leak detector you have, and it spots hidden leaks before the ceiling does.
When to Call an Emergency Plumber
Call straight away if water is spraying or pouring, coming through a ceiling or near electrics, or you cannot turn it off. Call the same day if a supply pipe or joint is still dripping after you have tried a quarter turn or a clamp, if the leak is on a soldered joint, a hot pipe or the boiler, or if you have had to turn off all the water and cannot manage without it.
I cover Ipswich, Felixstowe, Woodbridge, Kesgrave, Stowmarket and the surrounding villages, and I answer the phone myself, 24 hours a day, seven days a week, on 07977 857224. Describe the leak and I will tell you honestly whether it can wait until the morning.